Hello, everyone! We typically fill this blog with advice and insight on modern music industry, but this afternoon we have an internal announcement we’d like to share instead. We have been receiving requests for a grouping feature since at least 2012, and today we’re rolling out a new tool for clients that does just that. Don’t worry – we’ll have more info on life in the business for you soon.
This blog exists to promote the future of the entertainment industry, and to do that we need input from people like you and your entertainment-loving friends. If you have any questions about the content in this article, or if you have an artist you would like to see featured on this blog, please contact james@haulix.com. We can also be found on Twitter and Facebook.

New Feature – Promo Groups
Greetings!
Continuing our recent string of platform updates, we are pleased to announce Promo Grouping — a feature that will simplify your organizational efforts. This tool is one we have received many requests for, and we think you’ll find implementing it to be incredibly easy:
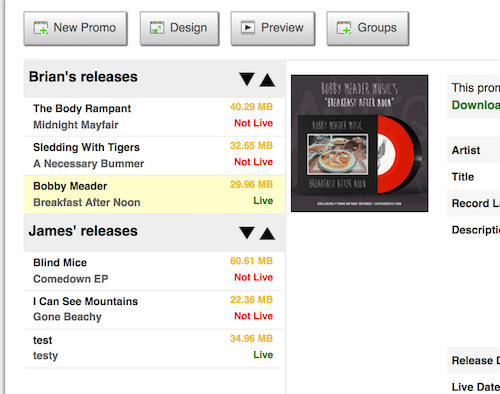
Sign into your Haulix account. On the Dashboard you will see your current promos listed at the bottom of the screen.
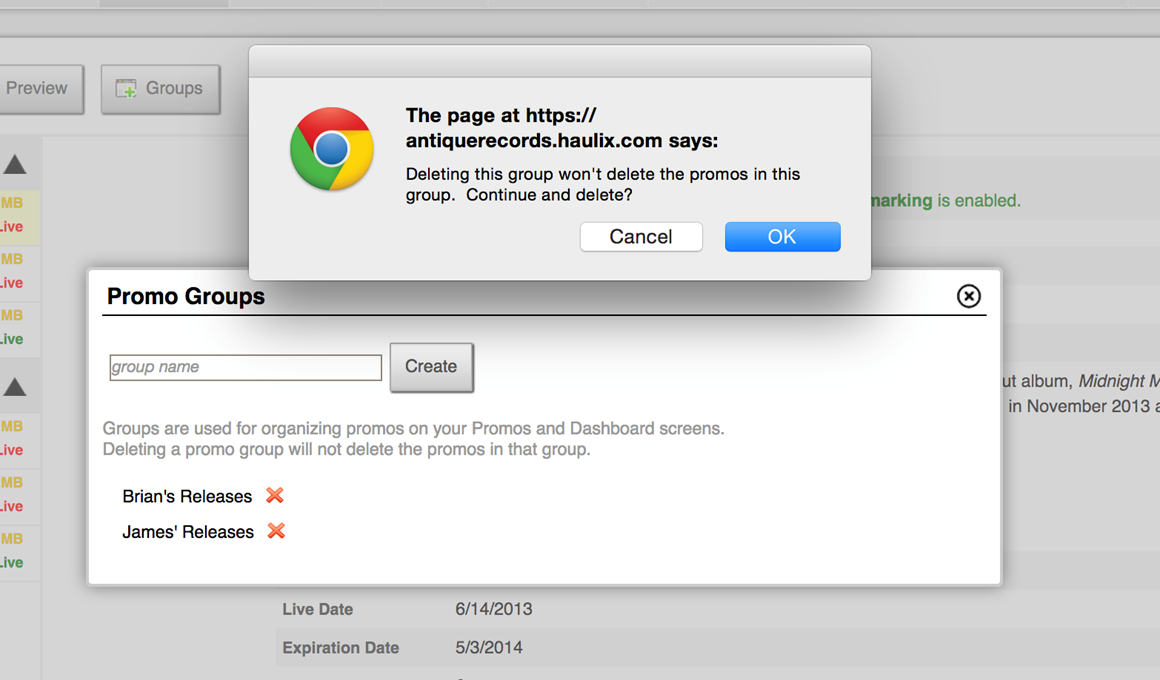
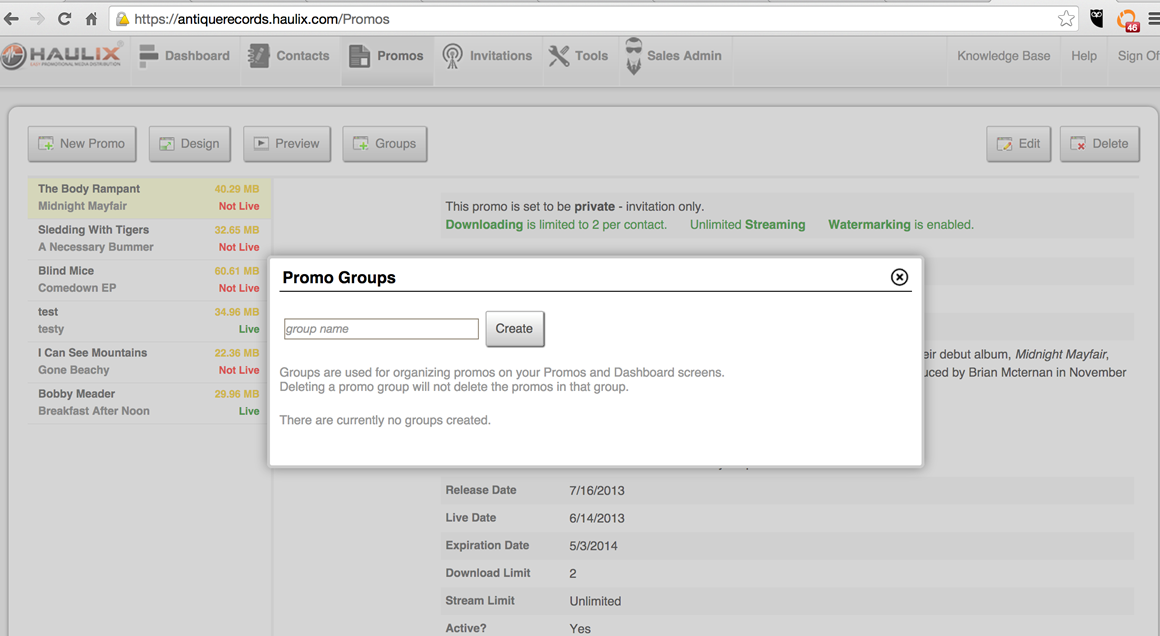
To begin creating Groups, first click the ‘Promos’ tab at the top of the page. When the new page loads, click the ‘Groups’ button at the top of the page. A new window will open and ask you to name your new group. Enter the desired title and click ‘Create.’ Another window will ask you to confirm the information. Agree and your new group will appear on the left rail of the ‘Promos’ page.
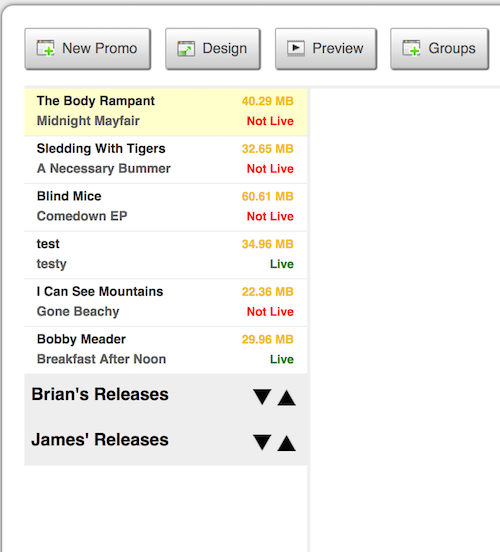
Once the Groups have been created, it’s time to organize your promos. Using the list of promos on the left rail, drag and drop each promo name underneath the group you want it assigned to. If you would like to organize the order in which the groups appear, use the arrows next to each group title to move them up or down the list.
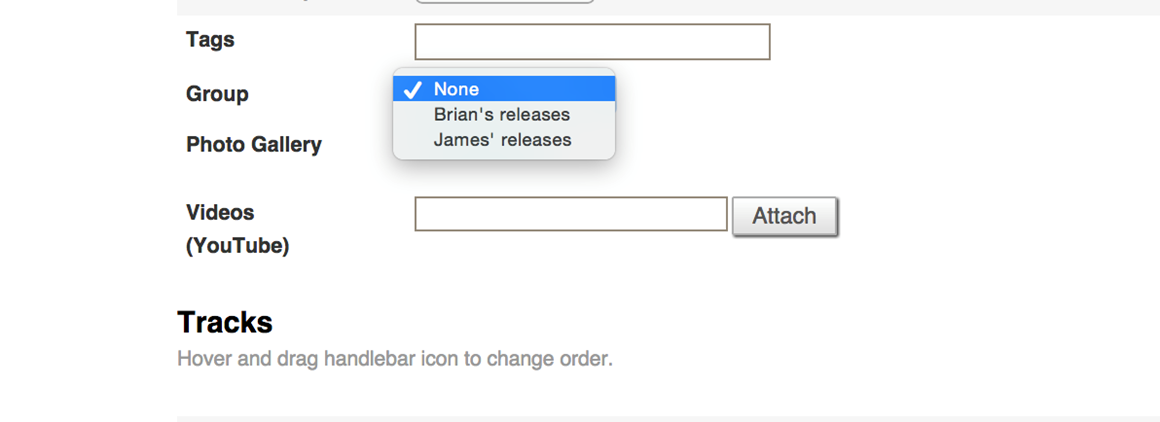
You can also assign your new promos to a group as they are made. When editing a promo, click the ‘Groups’ dropdown list on the promo screen and select the group you wish to assign that particular promo to:
The Groups created on these pages and the promo order set in place will immediately be reflected on your Dashboard and Invitation screens.